Introduction
Once upon a time, during my job training, I had to establish site-to-site connectivity for a company. The company has offices in Hamburg and Berlin. Its employees need to access internal services from both offices securely. They need a means to securely connect sites/services over an insecure connection.
Enter Virtual Private Network (VPN) tunnels.
A VPN is an overlay network that connects two or more private networks over a public network. It creates a secure, encrypted “tunnel” between its peers. Back then, many network and security folks advocated for the Internet Protocol Security (IPsec) suite to establish such site-to-site connections. IPsec had been around since 1996 roughly, was trusted by the community, and a prominent implementation under Linux was Strongswan website and Strongswan GitHub. If you are interested in IPsec’s historic Request for Comments (RFCs), which have since been superseded multiple times, see RFC-1825, RFC-1826, and RFC-1827.
Looking back, the configuration of the IPsec tunnel was rather involved. Depending on your needs, you had to understand and consider some or all of:
- UDP port 500 for the Internet Key Exchange (IKE),
- IP protocol 50, Encapsulating Security Payload (ESP), for encrypted data,
- IP Protocol 51, Authentication Header(AH), for data integrity and authentication,
- UDP port 4500 for Network Address Translation Traversal (NAT-T),
- and sometimes network appliances may try TCP ports 500 and 4500 as fallback.
Ugh, that is a lot! Establishing VPN connectivity between sites was “extra fun” when one site used a Linux server and the other a locked down network appliance with its dialect of IPsec parameters.
Good times!
Many years later—Is there an easier way to set up a VPN today?
An Exploration with Wireguard
Wireguard is a relatively new way (2015) to establish Virtual Private Network (VPN) tunnels, see timeline below of tunneling options/capabilities. I was interested how easy it would be, if at all, to build a VPN tunnel with WireGuard.
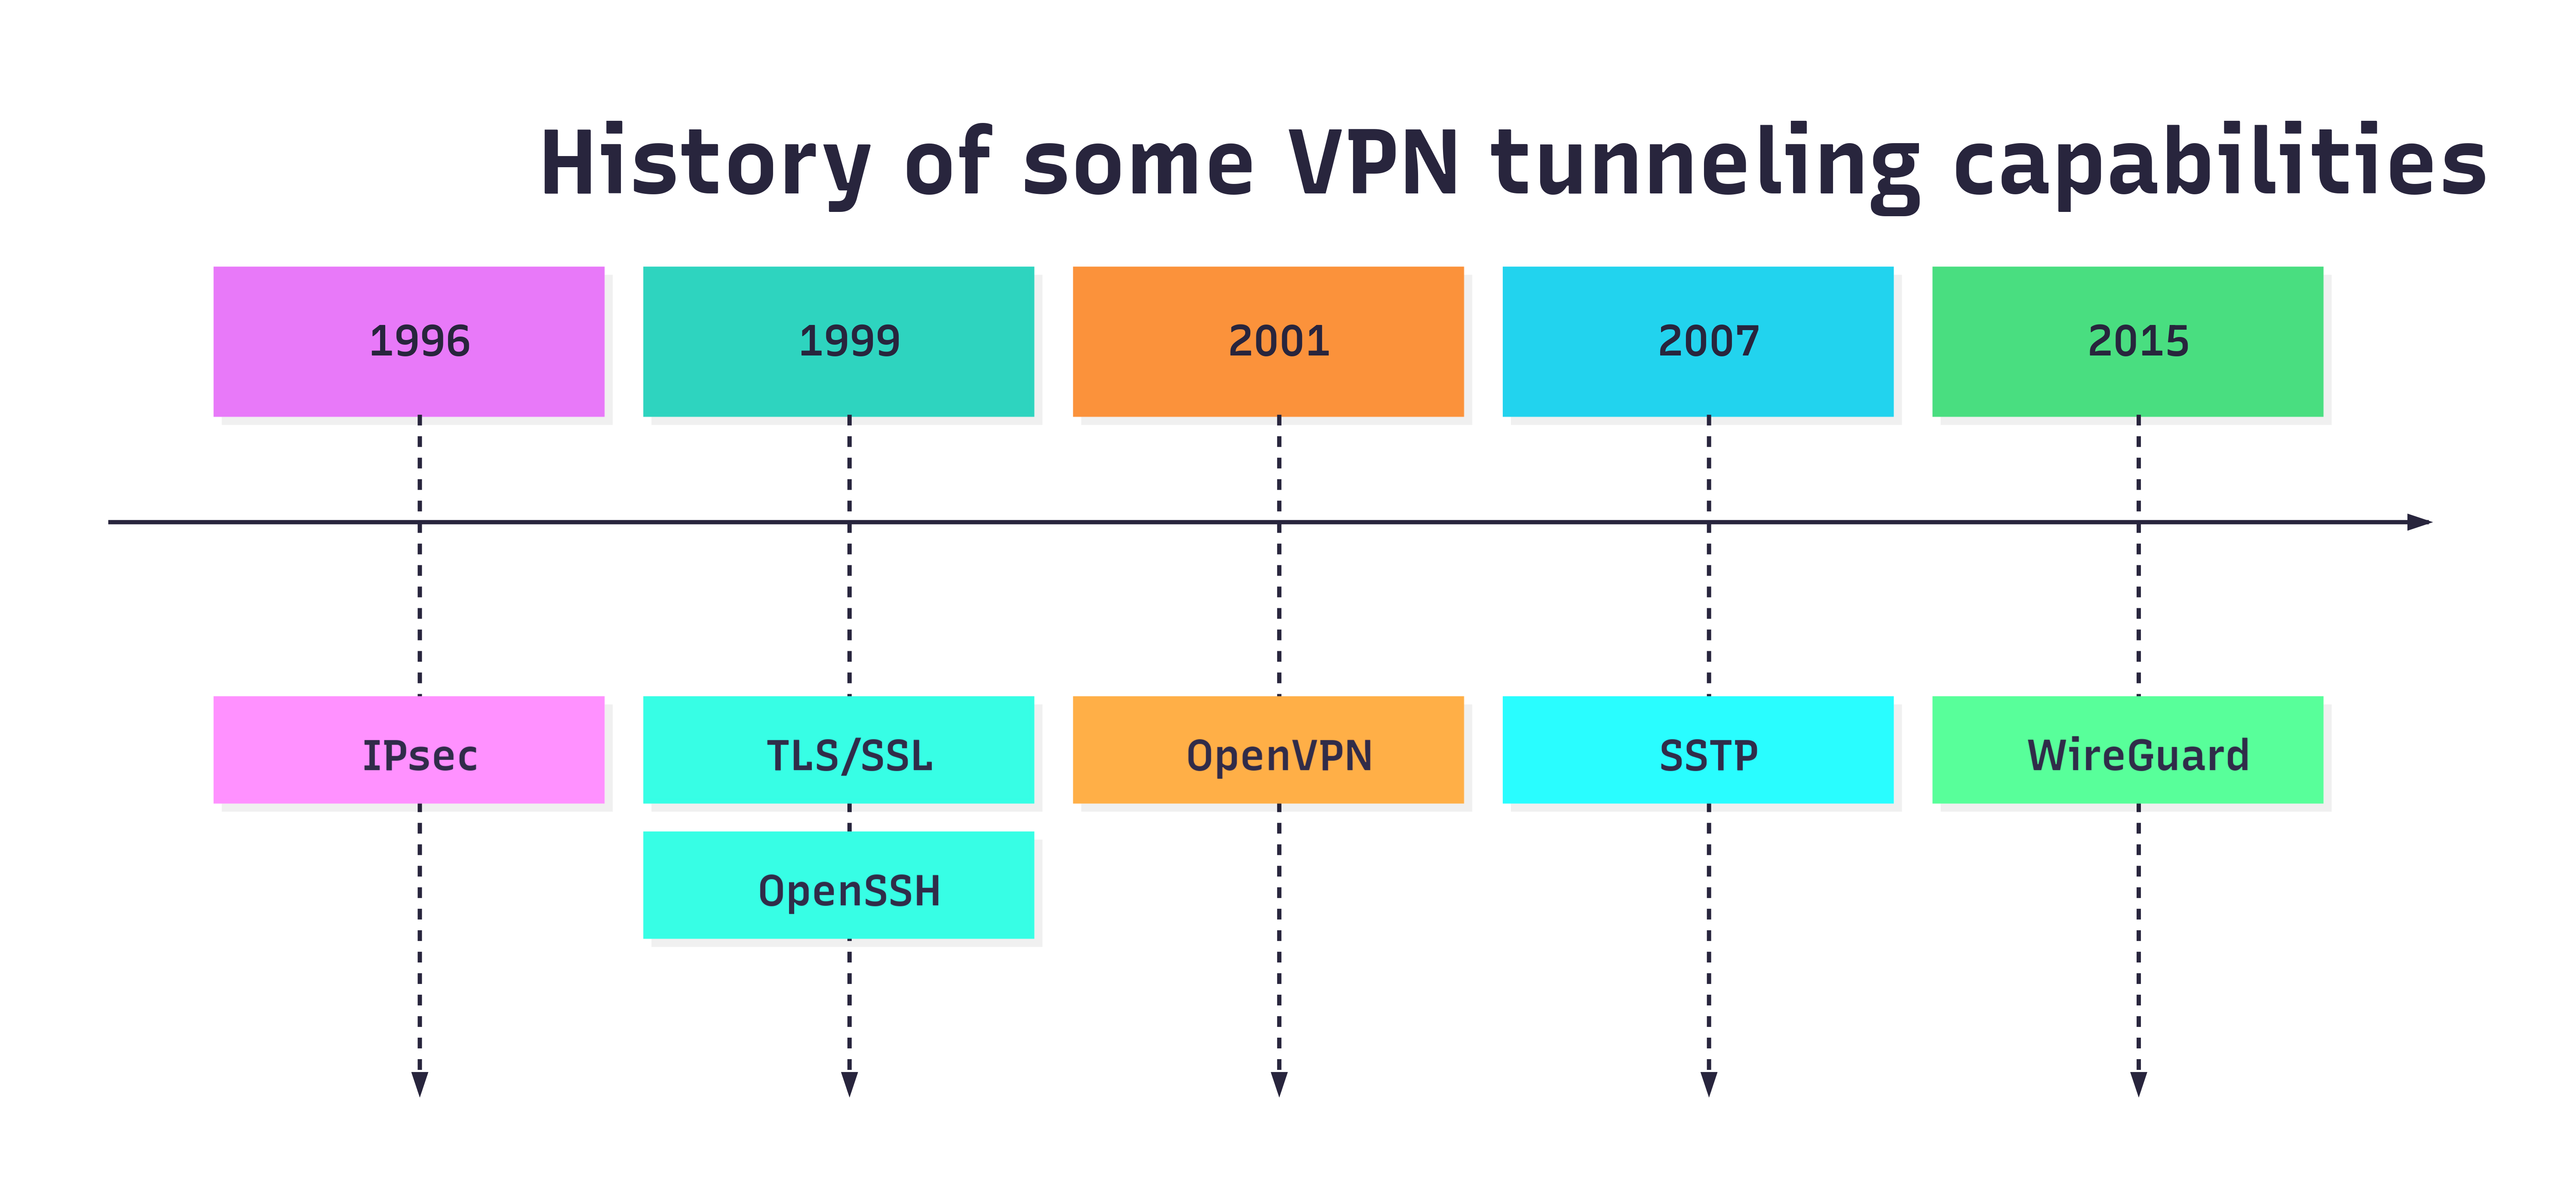
The WireGuard project puts its goals succinctly as: “WireGuard® is an extremely simple yet fast and modern VPN that utilizes state-of-the-art cryptography. It aims to be faster, simpler, leaner, and more useful than IPsec, while avoiding the massive headache.” Reference: WireGuard start page.
I will define a simple architecture for our lab environment next.
Architecture
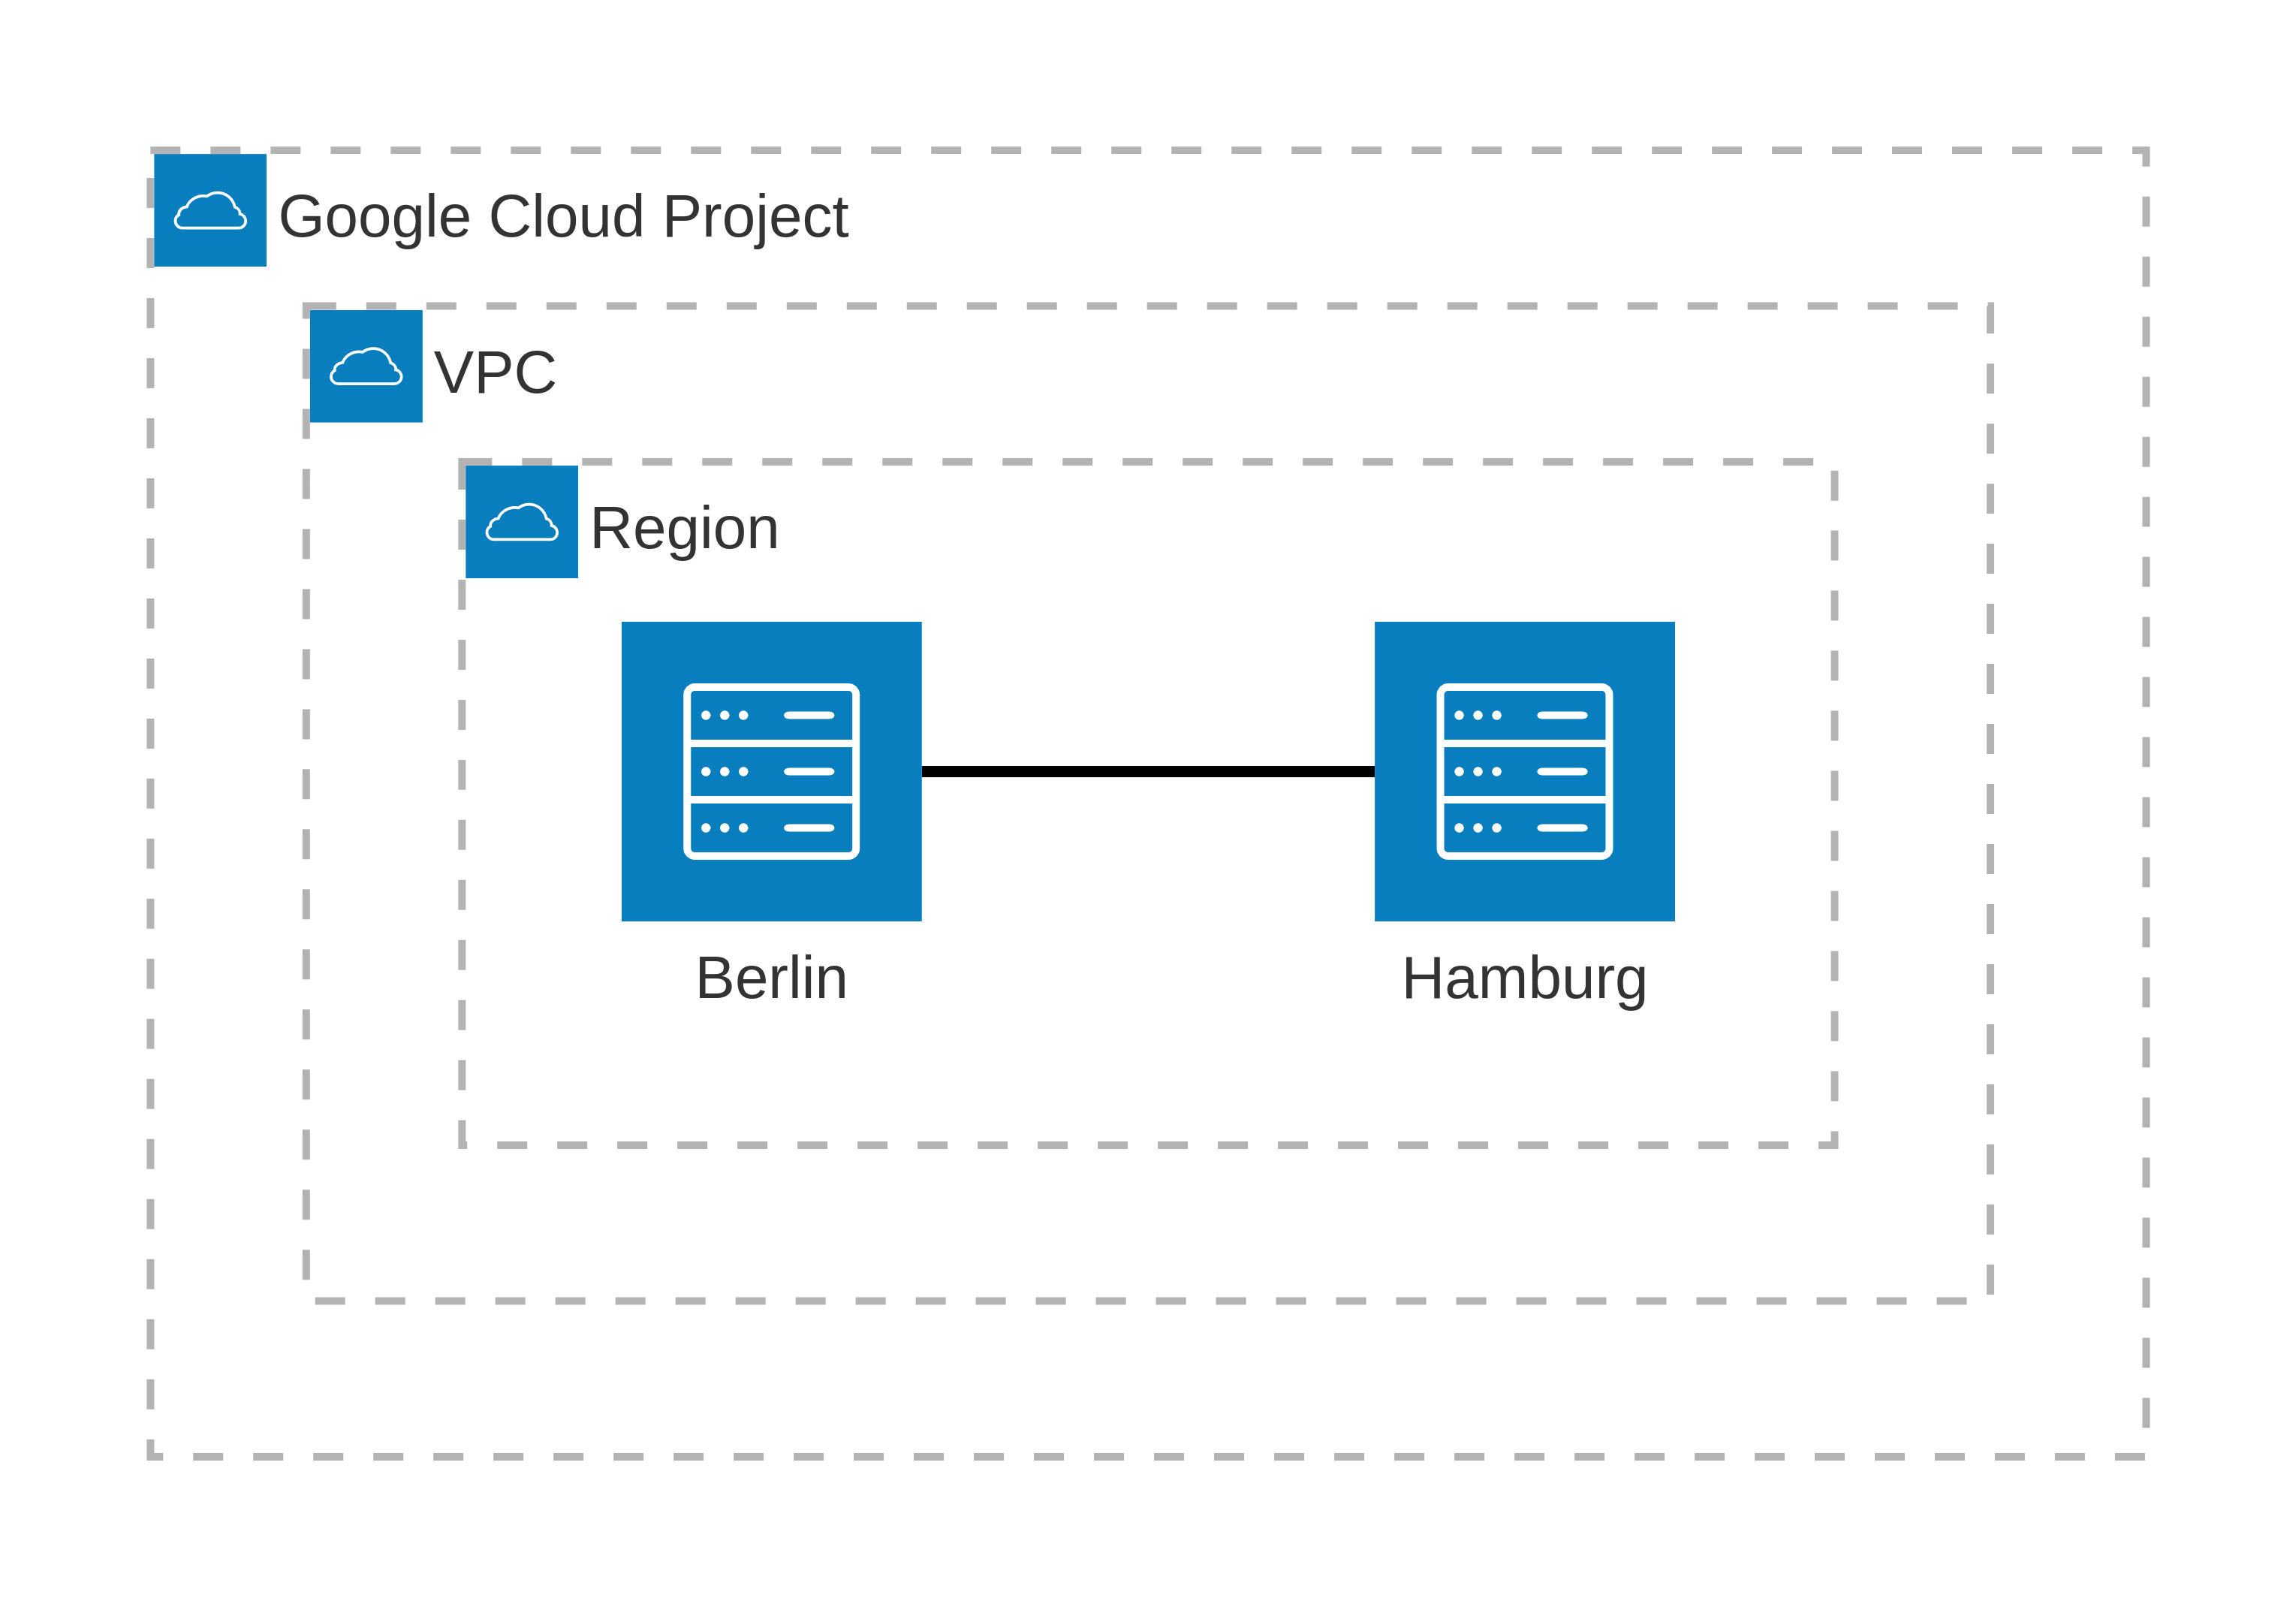
I will use two Google Compute Engine (GCE) instances representing our two offices in Hamburg and Berlin. There is no firewall between the instances. They will establish VPN connectivity over UDP port 51820.
The diagram shows the two GCE instances in GCP.
Next, I will make some assumptions and then describe and configure my lab environment. Assumptions
If you want to explore this setup yourself, I assume:
- Basic Linux experience
- Basic networking experience
- Access to Google Cloud
- No firewall between the GCE instances
hamburgandberlin - Run as
root
My Environment
You need two Google Compute Engine (GCE) instances with no firewall between them. It is for demonstration purposes only.
- Hamburg
- ens4 :
10.128.0.2 - wg0 :
192.168.2.1
- ens4 :
- Berlin
- ens4 :
10.128.0.3 - wg0 :
192.168.2.2
- ens4 :
- Config
- Machine :
e2-small - Region:
us-central1 - OS: Ubuntu 25.10 minimal
- Disk:
10Gbyte
- Machine :
Ubuntu Prerequisites
First, we need to install wireguard and tools. Then, we load the wireguard kernel module.
Install Packages
Connect to the hamburg GCE instance.
# replace $MYPROJECT with your actual GCP project or set the variable
gcloud compute ssh --zone us-central1-c hamburg --tunnel-through-iap --project $MYPROJECT
Stop AppArmor, install the wireguard kernel module, its userspace tools, and ping.
apt update
apt install -y iputils-ping wireguard wireguard-tools bash-completion
systemctl stop apparmor
# ensure bash completion works
exit
sudo su -
💡 Fun fact: Should you ever wonder what packages you installed after the base operating system (OS), the most effective command might be apt-mark showmanual.
# Lists user-installed packages including dependencies
apt-mark showmanual

# Shortened output below
[...]
iputils-ping
wireguard
wireguard-tools
Load Kernel Module
Load the wireguard kernel module.
# Load the wireguard kernel module
modprobe -v wireguard

# example output
insmod /lib/modules/6.17.0-1005-gcp/kernel/net/ipv4/udp_tunnel.ko.zst
insmod /lib/modules/6.17.0-1005-gcp/kernel/net/ipv6/ip6_udp_tunnel.ko.zst
insmod /lib/modules/6.17.0-1005-gcp/kernel/lib/crypto/libcurve25519-generic.ko.zst
insmod /lib/modules/6.17.0-1005-gcp/kernel/arch/x86/crypto/curve25519-x86_64.ko.zst
insmod /lib/modules/6.17.0-1005-gcp/kernel/drivers/net/wireguard/wireguard.ko.zst

# Verify with lsmod
lsmod | grep wireguard

# example output
wireguard             118784  0
curve25519_x86_64      36864  1 wireguard
libcurve25519_generic    45056  2 curve25519_x86_64,wireguard
ip6_udp_tunnel         16384  1 wireguard
udp_tunnel             36864  1 wireguard
Configure Interfaces and Wireguard
Next, we add and configure a network interface for our wireguard tunnel. After that, we will generate the cryptographic keys for wireguard and configure the tunnel between Hamburg and Berlin.
Configure Network Interfaces
Create a new network interface named wg0 with type wireguard.
# Add wg0 network interface of type wireguard
ip link add dev wg0 type wireguard

# Verify
ip address show dev wg0

# example output (shortened)
3: wg0: <POINTOPOINT,NOARP> mtu 1420 qdisc noop state DOWN group default qlen 1000
    link/none
Assign an IP address to the wg0 interface.
Hamburgwill be192.168.2.1, andBerlinwill be192.168.2.2.
# Assign IP and peer to wg0
ip address add dev wg0 $WGIP/24

# Verify
ip address show dev wg0

# example output (shortened)
3: wg0: <POINTOPOINT,NOARP> mtu 1420 qdisc noop state DOWN group default qlen 1000
    link/none
    inet 192.168.2.1/24 scope global wg0
       valid_lft forever preferred_lft forever
At this stage, we need cryptographic keys to set up the tunnel.
Set up Wireguard Tunnel
Generate public and private keys for Wireguard. To prevent an error where wireguard cannot read the private key, for example, in your /root/ directory due to AppArmor, we will change our current working directory.
FYI, here are the errors I experienced while having the key material in my /root/ folder.
The command wg set wg0 private-key ./private-key errors with fopen: Permission Denied.
Similarly, you can find AppArmor entries in your systemlogs.
⚠️ Warning: AppArmor may prevent reading the privatekey.
# inspect logs for AppArmor DENIED entries
journalctl | grep -i armor

# example AppArmor DENIED entry
Dec 23 16:02:01 hamburg kernel: audit: type=1400 audit(1766505721.830:206): apparmor="DENIED" operation="open" class="file" profile="wg" name="/root/privatekey" pid=1206 comm="wg" requested_mask="r" denied_mask="r" fsuid=0 ouid=0
To prevent the above error, we change into the wireguard configuration folder.
cd /etc/wireguard
umask 077
wg genkey | tee privatekey | wg pubkey > publickey
Below is an example of the generated key pair.
-rw------- 1 root root 45 Jan  6 10:15 privatekey
-rw------- 1 root root 45 Jan  6 10:15 publickey
Use the private key with wireguard.
# wg set - Sets configuration values for the specified <interface>
# if listen-port is not provided, it will be chosen at random
wg set wg0 private-key /etc/wireguard/privatekey listen-port 51820
Activate the network interface wg0.
# activate the network interface wg0
ip link set up dev wg0

# Verify
ip address show dev wg0

# example output (shortened)
3: wg0: <POINTOPOINT,NOARP,UP,LOWER_UP> mtu 1420 qdisc noqueue state UNKNOWN group default qlen 1000
    link/none
    inet 192.168.2.1/24 scope global wg0
       valid_lft forever preferred_lft forevers
View the current wireguard configuration.
# View wireguard config
wg
# equivalent to
wg show

# example output
interface: wg0
  listening port: 51820
⚠️ Warning: Repeat the above steps on Berlin before you continue.
Define the VPN tunnel on Hamburg. Ensure the port matches the wg output from the peer.
# On Hamburg
#
# As arguments, use the public_key, wg0 IP, and ens4 IP from peer-b
wg set wg0 peer 9O/Wm3NJeinXGKk5s6sqtOS/rKWf7z45Nc2mFRecKUw= allowed-ips 192.168.2.2 endpoint 10.128.0.3:51820

# View configuration
wg

# example output
interface: wg0
  listening port: 51820

peer: 9O/Wm3NJeinXGKk5s6sqtOS/rKWf7z45Nc2mFRecKUw=
  endpoint: 10.128.0.3:51820
  allowed ips: 192.168.2.2/32
Similarly, define the tunnel on Berlin. Ensure the port matches the wg output from the peer.
# On Berlin
#
# As arguments, use the public_key, wg0 IP, and ens4 IP from peer-a
wg set wg0 peer rXiDojveu4Q6VVIzw2Pm1LFBJLbeWSV6rc/MQqcpWlE= allowed-ips 192.168.2.1 endpoint 10.128.0.2:51820

# View configuration
wg

# example output
interface: wg0
  listening port: 51820

peer: rXiDojveu4Q6VVIzw2Pm1LFBJLbeWSV6rc/MQqcpWlE=
  endpoint: 10.128.0.2:51820
  allowed ips: 192.168.2.1/32
Ping the peer through the tunnel to confirm reachability.
# On hamburg
#
ping 192.168.2.2
PING 192.168.2.2 (192.168.2.2) 56(84) bytes of data.
64 bytes from 192.168.2.2: icmp_seq=1 ttl=64 time=1.36 ms
64 bytes from 192.168.2.2: icmp_seq=2 ttl=64 time=0.713 ms
64 bytes from 192.168.2.2: icmp_seq=3 ttl=64 time=0.563 ms
Finally, inspect the tunnel status with wireguard.
# show tunnel status with wireguard
wg

# example output
interface: wg0
  public key: rXiDojveu4Q6VVIzw2Pm1LFBJLbeWSV6rc/MQqcpWlE=
  private key: (hidden)
  listening port: 51820

peer: 9O/Wm3NJeinXGKk5s6sqtOS/rKWf7z45Nc2mFRecKUw=
  endpoint: 10.128.0.3:51820
  allowed ips: 192.168.2.2/32
  latest handshake: 1 minute, 35 seconds ago
  transfer: 1.05 KiB received, 1.23 KiB sent
Here is the video of the steps above. It starts after we ran these commands:
apt update
apt install -y iputils-ping wireguard wireguard-tools bash-completion
systemctl stop apparmor
# ensure bash completion works
exit
sudo su -
Video:
Reflection So Far
Well, that was pretty easy and straightforward 😄.
We did have to type quite a few commands though. Here is a summary of the WireGuard-related steps. We used:
- three
ipcommands to bring up the network interface, and - three
wgcommands to configure WireGuard
# summary of WireGuard-related commands
modprobe -v wireguard
ip link add dev wg0 type wireguard
ip address add dev wg0 $WGIP/24
cd /etc/wireguard
umask 077
wg genkey | tee privatekey | wg pubkey > publickey
wg set wg0 private-key /etc/wireguard/privatekey listen-port 51820
ip link set up dev wg0
wg set wg0 peer 9O/Wm3NJeinXGKk5s6sqtOS/rKWf7z45Nc2mFRecKUw= allowed-ips 192.168.2.2 endpoint 10.128.0.3:51820
Can the commands be streamlined after our one-time setup?
WireGuard Provides
It is quick and easy setting up the tunnel interface with wg-quick.
Now, that we have our configuration, we can save it to a file.
That way, we can quickly bring up the tunnel with a single command.
# save current wg configuration to a file
cd /etc/wireguard
touch wg0.conf
wg-quick save wg0
The wg-quick tool allows us to quickly bring our interface wg0 up/down.
You can explore this with the following commands.
# bring the interface down
wg-quick down wg0
# example output
[#] ip link delete dev wg0

# verify
ip addr show wg0

# bring it up
wg-quick up wg0
# example output
[#] ip link add wg0 type wireguard
[#] wg setconf wg0 /dev/fd/63
[#] ip -4 address add 192.168.2.1/24 dev wg0
[#] ip link set mtu 1380 up dev wg0

# verify
ip addr show wg0
wg show
Neat! 🤩
And, if you want to add it as a systemd service:
sudo systemctl enable wg-quick@wg0.service
sudo systemctl daemon-reload
Cool, cool, cool! 🤓
Summary
WireGuard delivers what it promises. It is a fantastic way to create a secure VPN tunnel these days!
If you are interested how WireGuard’s performance compares to IPsec and OpenVPN, check this out.